How to create support, booking and welcome chat pages with AI Agents.
By Arthur Rain • September 28, 2025
Time flies. We’re all getting busier, and at the same time, tired of daily routines—both in life and in business.
These days, creating a great product or service isn’t enough. It’s just as important to provide a smooth, comfortable customer experience—whether that’s through support, booking systems, or even AI-powered appointment assistants like ChatPages.
Desktop view ChatPageAI
Let’s imagine your business: You deliver high-standard services locally, have a beautifully designed website, and maintain an impressive number of 5-star reviews. You’ve even connected your phone line with a booking form. Sounds perfect, right?
But here’s the reality: Customers still call with random questions. Your receptionist or assistant is constantly answering the same inquiries—wasting time and, potentially, missing real sales leads.
That’s exactly why we created ChatPages AI inside WorkdeskApp. And the best part? It’s surprisingly easy to set up. If you can use a web browser, you can have a smart, automated chat and booking assistant live on your website in just a few minutes.
Here's How to Get Started:
Sign up for WorkdeskApp. Just enter your business name, your name, and email. Confirm your email, and you’re in. Welcome to Workdesk!
Open your dashboard. It might look a little empty at first—but don’t worry, it’ll come to life quickly.
Go to the “Chats” tab or just click “Create new chat” from the dashboard.
Create your first ChatPage.
Paste in your website link, and our AI Agent will automatically scan it and fill in key information.
Or, if you prefer, write your knowledge base from scratch.
This knowledge base is crucial—it teaches the AI how to talk about your business.
Customize your chat style. Choose whether you want the tone to be professional, friendly, or short and official.
Your ChatPage is now created! You’ll see a chat card in the “Chats” menu.
By default, your ChatPage can:
Accept live chat transfers into your CRM dashboard
Book appointments
Handle callbacks (All based on your business hours.)
You can enable or disable each of these features in Chats > Settings using simple checkboxes.
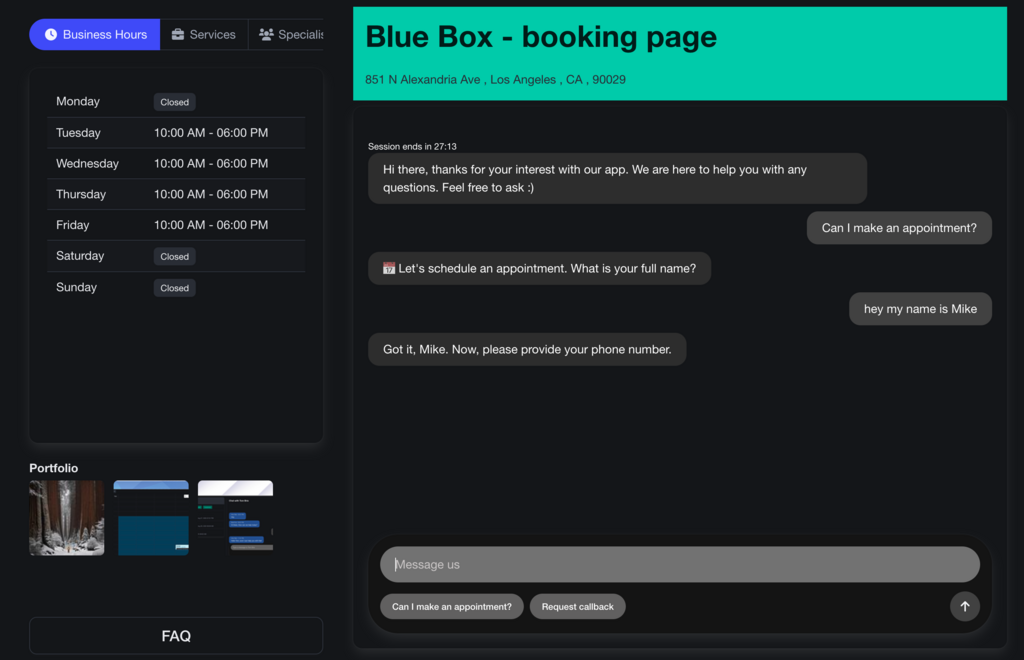
Preview your ChatPage. Click the “Preview” button to see how it looks to your customers. Type something in the chat to test how ChatPage AI responds—it already knows your business info.
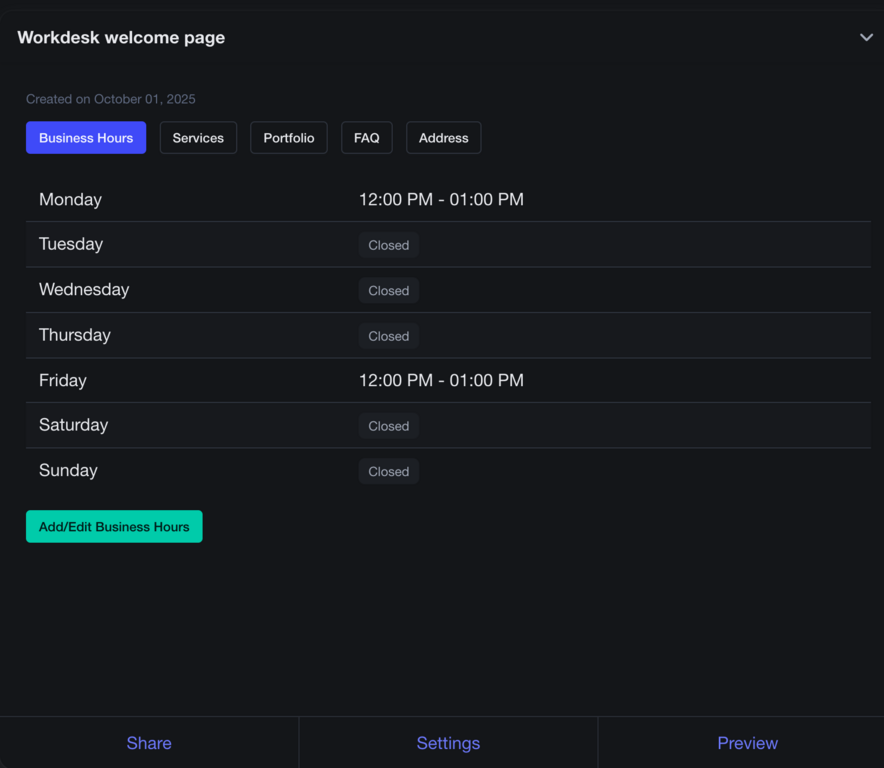
Booking Settings
Screenshot 2025-10-03 at 12.52.33 AM.png142 KB
Each ChatPage includes features like:
Business Hours
FAQ
Portfolio
Services
Staff
Let’s say you run a nail salon with 4 specialists and want to set up booking based on your business hours.
Here’s how:
In “Chats”, find the ChatPage card by its name.
Click on “Hours” > “Edit business hours” Set your working hours for each day.
Go to “Services” > “Add” Add your services, prices, and descriptions—these will be shown to customers.
Want to assign staff?
Go to “Dashboard”
Click “Staff” from the menu
Then select “Add staff” to enter each team member.
Now, when customers chat with your AI Agent, they can ask about services, pricing, or even click a button to make an appointment.
ChatPage AI will:
Create a new customer in your Workdesk CRM
Schedule the appointment
Let the customer choose their preferred time, staff member, and service
It’s like having a full-time booking assistant—without the overhead.